Wednesday 30 December 2015

Reflections and Projections 2015-2016

To wrap up the year, I thought I'd do a post on what I've done this year and am hoping to do for next year. I do have a newly finished dress to blog, but I haven't photographed it yet so it will have to wait until next year.


Reflections on 2015

I'm pretty happy with my range of makes for this year. More dresses (eleven) than anything else, but I am a big fan of dresses. I also made nine tops, including jumpers, sleeveless/short sleeved, and long sleeved makes, and both formal and casual styles. I designed eight of my makes myself, and the rest were made from a variety of different patterns from the big 4 and independent pattern makers. I also had my first attempt with denim making my DuBarry coat dress, which was scary and often frustrating, but I'm really happy with how it turned out.


Getting to know other sewists on their blogs and Instagram has been fun and new to me. The best part was going to Frocktails in Canberra and meeting a bunch of other Australian sewists in person. Sewing can be a solitary hobby, so actually getting to meet and chat to others, to share advice and excitement about sewing, is really special.


The year of sewing has been fun, but there were a few things that I didn't quite achieve. I was a bit erratic in my posting. Pretty good in February and March, then less so through August, and a bit more frequent from September on. Hopefully in 2016 I can be more consistent. I also didn't manage to hit my Vintage Pledge aim. I did set myself a high goal of using 6 vintage patterns AND 6 vintage fabrics. In truth I did make 6 items from vintage patterns, 5 of which are published. The sixth was made as a gift for a friend and has yet to be photographed and so is yet to be posted. I did woefully on using my vintage fabrics, though. I only used two. Although to be fair I didn't check how much vintage fabric I owned before making my pledge, so I really gave myself an almost impossible goal.

And now my best/worst (favourite/least favourite?) makes of the year. Happily I only have one thing I'd really put on my 'worst' list, my slashed sleeve top. Basically, I made the slashed pieces too narrow and they're a pain to iron or keep flat, so I don't wear it.


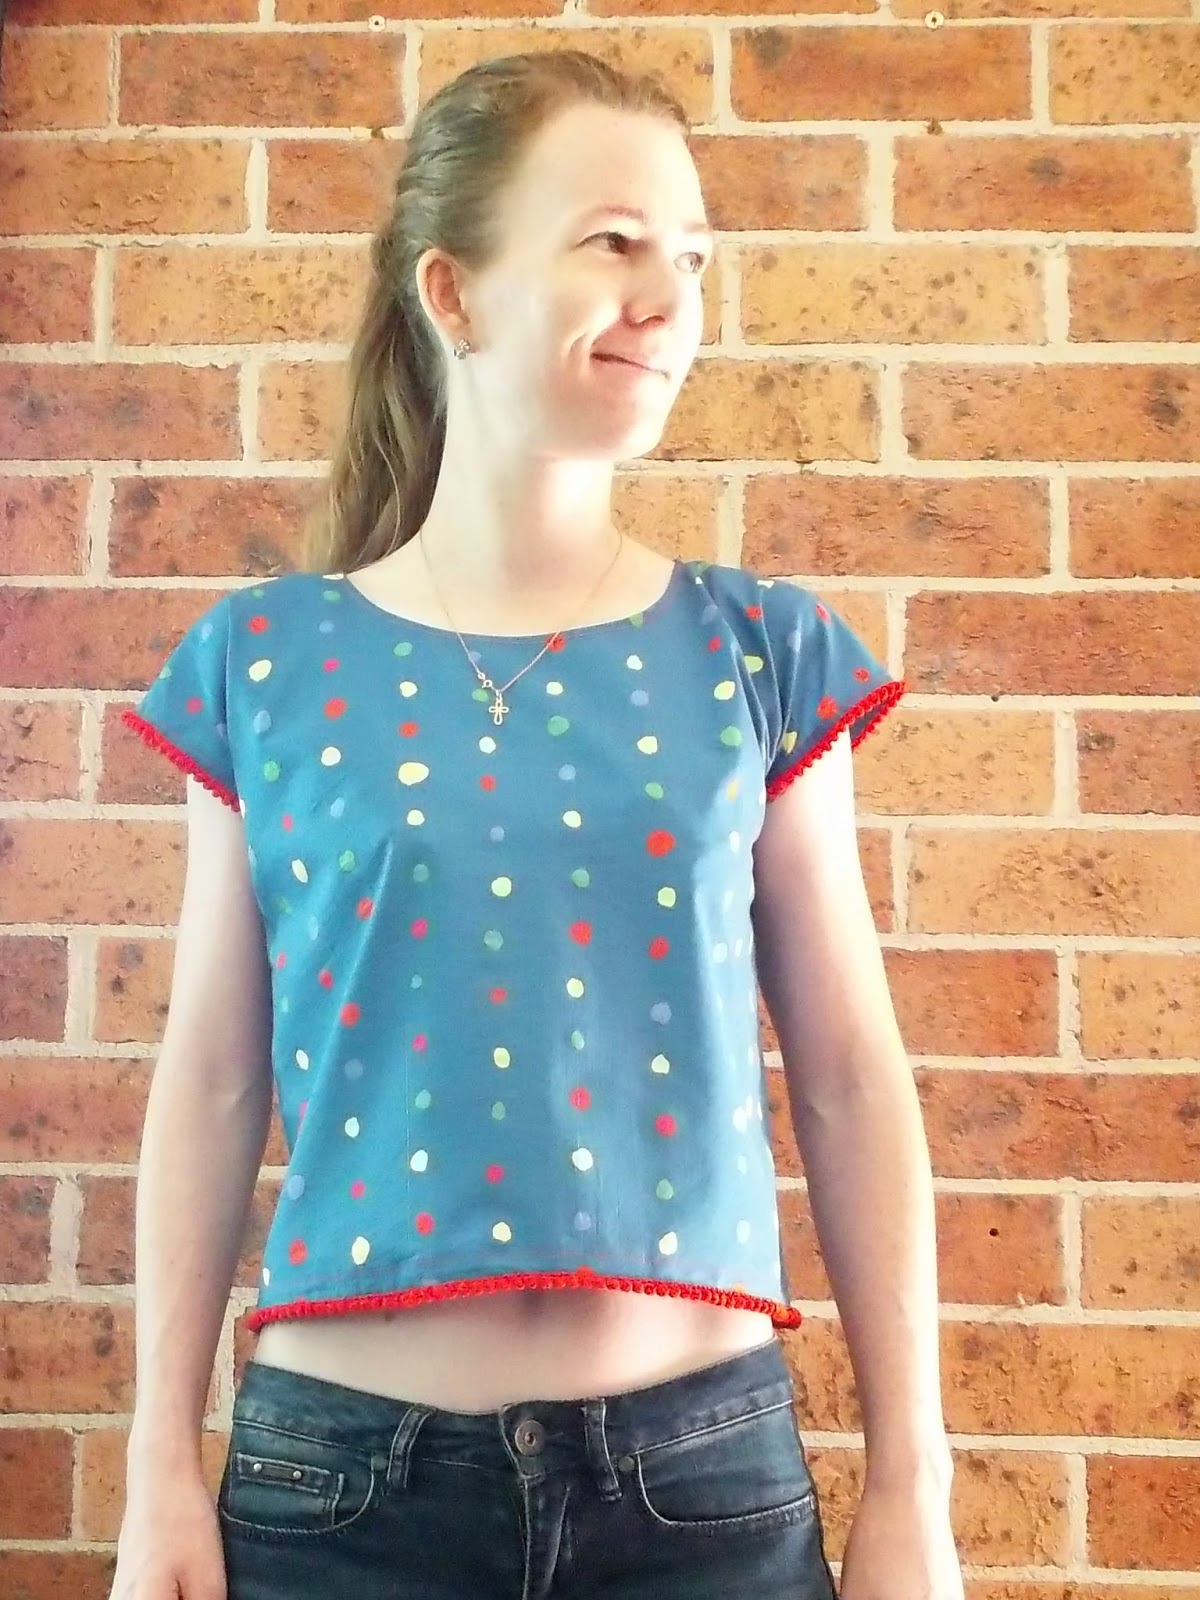
For best makes, I have a top five. Fifth is my last make, my Tessuti Kate Top. I haven't yet worn it because it's currently the Christmas-New Year's break so I'm not at work, but I can see this getting a lot of wear. And the colours of the fabric are wonderful. Fourth is the Winter Garden Party dress. This is one of the few vintage fabrics I used this year. I'd had the fabric for a few years but couldn't find any pattern I thought suited it, but this one from Honig Design was great. The pintucks are my own addition. Third is my Antheia Maxi. I'd seen this fabric in Tessuti for a few years but never knew what to do with it, because I didn't want to cut any of the print. My self-designed wraparound maxi means all the print is still shown. It's also beautifully soft and great to wear on a really hot day.


My second favourite make of the year is one I am really proud of; my Hand-Sewn Guipure Lace Top. I bought this beautiful remnant of lace because it was heavily discounted. I got in my mind a picture of how it could be a lace top, but really had no idea of whether or not it would work. The entire thing is hand sewn which took a fair bit of time and patience, but I'm so happy with how it turned out - it's pretty much exactly what I envisioned!


My favourite make, though, is my DuBarry Coat Dress. I had a lot of stress making it, with problems with the denim, cutting out the wrong pieces, and even running out of denim before I made the facings (which then had to be completely different fabric), but it was all worth it for the final product. And because I used denim, it works as both a coat and a dress - two garments for the price of one!

Projections for 2016

I have a few big aims for 2016. I've just started a new job, so I'm going to need to make some clothes that are more suitable for wearing in an office. I want to use up as much of the fabric I already own as I can, and be more thoughtful when I buy new fabric. I need to get my overlocker fixed and learn how to use it. I also want to learn to master - or at least be reasonably good at - pants. I've made a few pairs over the years, but it's still a scary prospect. Overall, I want to try and make pretty much all my clothes for 2016, with the exception of knitted things and underwear. I'm not sure if I'll manage it, but I'll give it my best shot.


I sat down a few days ago and started writing a list of what I plan to make in 2016, and it's pretty long. There are twelve items that already have specific fabrics, although I haven't decided on the pattern to use for all of them. For my plan to master pants, I alread have a linen blend fabric and two different denims. Seeing as I already have the fabrics, I really have no excuse. I also have a swimsuit, cream skirt, and sleeveless blouse at the very top of my list to start on today and over the weekend. Hopefully having that list already written down will help me be consistent with making and posting.


So I think that's all. Happy new year!

Sunday 20 December 2015

Silk Tessuti Kate Top aka Grown-Up Clothing Item #1


So I got offered a new job a couple of weeks back! I'd been looking for work for a while, in the meantime doing short-term projects, but nothing with any permanence or certainty. But I had an interview in mid-November and managed to be successful, so yay me! Anyway, all this has to do with sewing because this is a job in an office, where I'd previously been at a university/working from home. Although it's not a corporate or particularly formal office, I do still need to dress a bit differently to how I have been.


Tessuti released their Kate Top pattern in early November, at the same time as I made it through to the first round of the recruitment process for the job. It was a beautiful pattern, plus they had an Instagram competition for making it, so I was already tempted. When I got offered an interview I started really seriously thinking about buying the pattern. If I was successful, I'd need some more grown-up clothes, and a classic shell top is very versatile and grown-up.


The interview went well, and the offices are about a five minute walk from Tessuti's Surry Hills store, so I rewarded myself with a trip over there. Looking around for something that would be good for this pattern I spied this gorgeous silk. It's called Beautiful Spill and is wonderfully soft and vibrant and I just couldn't pass it up. I knew I had to get it and make the Kate Top with it.


Because the print is very bright I decided to make view A, with the lower neckline so that the colour wouldn't be completely overwhelming. I made size XXS, which fits very well. The top is designed to be a bit loose, and the drapey silk works really well with that bit of extra room from the bust to the waist. Being a slight build I probably could have left the bust darts off because they don't add any shaping for me, so in the future I might not include them. 


I was a little daunted about sewing with the silk. I have sewn with silk before, but only a few times, and with taffeta and dupion, not with something delicate and light like this. However it wasn't that bad in the end. I used a new size 8 machine needle, a lot more pins than normal, and went slowly, and I didn't have any issues. I also did French seams as the safest way to treat a delicate fabric, so that the raw edges would be hidden away. The only real problem I had with construction was sewing the bust darts on the wrong side of the fabric and having to redo them. There is a front and back to the fabric, but the colours are still very bright and you have to pay attention to notice the difference, which I obviously didn't do at first when doing the darts!


There were a few new techniques in making this. The side splits were something I'd never done before, and looking at the pattern pieces I had no idea how they can together. But the instructions given were really clear and easy to follow. I did stitch them down slightly differently to the instructions, doing each of the four side split sections individually, rather than doing them all in one with the hem. Although the silk did turn out to be easy to sew with, I thought it would be best to concentrate and get each edge done properly by themselves rather than run the risk of the whole thing going wrong. It might have been fine without my precautions, but better to be safe than sorry.


The other new-to-me techniques were using tearaway vilene and making self bias binding. The vilene on the neckline and armholes works to stabilise it, which is especially helpful on a light fabric like this silk. With it, I was able to hang the top as I went along, making it easier to pin things together and see if it was all coming together right. The bias binding was trickier. This silk doesn't really seem to crease - great for wearing the top, but not so good when trying to press a fold on the self bias. In the end I had to accept I wasn't going to get it pressed much at all, and just had to use a lot of pins and pay extra attention to make sure it was attached correctly. It isn't perfect, but for a first attempt and with a fabric that isn't really designed to be used as bias, I think it turned out pretty well.


So this is the first item for my (slightly) more grown-up work appropriate wardrobe. And I love it. I'm really happy I decided to use the silk and didn't avoid it because it's a scary fabric. The colours and the drape are both perfect for the pattern. And I think wearing this to an office I can pass as a real and responsible adult!


Monday 14 December 2015

Casual Cotton Summer Pants


Although I love skirts and dresses for hot weather, sometimes pants are good for practicality reasons. Shorts are obviously a great option, but hot weather pants can be a bit trickier - they need to be breathable in both their shape and fabric choice. And I also don't want something that looks too slobby, for want of a better word. Also, I'm not really a fan of elasticated waists, which limits my options a bit.


This pattern is one I've had in my collection for a while, Simplicity 4290, a 1960s pattern for shorts and slim-fitting pants. The fabric I bought at a local op shop for the grand total of $1.50. When I saw it earlier this year I thought it would be a good choice for some casual pants. It's a lightweight black cotton with a pattern of gold foil printed stripes/zig zags. You can feel the foil printing on top of the fabric, but it's not at all stiff, so the fabric still has a soft flow.

The original pattern was moderately high waisted - it was from the early 1960s - but I wanted these to be relatively casual, so I lowered the waist by about two inches. I also widened the legs from the hips to mid-calf, as the original pattern was slim fitting, but tapered back in at the ankles. I didn't want the pants to be too fitted, because they're for summer and need to allow good airflow, but also didn't want them too wide or they'd end up looking a bit clown pant-y. I think I managed to find the middle ground!


The one thing I didn't think about when shortening the waist was the waistband. I'd already decided that, seeing as I had the stripes running vertical for the pant legs, I'd have the wide triple stripe going horizontal for the waistband. The pattern piece was a straight rectangle, so this seemed fine when I cut it out and sewed it in. But where a completely straight waistband works fine when resting at the natural waist, when you move it down lower there's all this extra curve as your body widens down to the hip. The back in particular had a bit of a gape. It obviously needed a fix.


I of course didn't want to lose that nice horizontal line of the waistband that the gold stripes gave it. So I decided to add two small darts either side of the centre back, taking care to not mess up the line of the stripes. You can see in the photo above where I've put the two darts, but I think I managed to avoid making it look like a mistake, and hopefully made it look like it's just a normal part of the pattern.


The pants have a side zip on the left, rather than a fly or elasticated waist. I used an invisible zip to make sure there wouldn't be any bulk or anything showing at the seam. I had initially been thinking about adding pockets, because pockets are such a useful thing, but didn't want to add any bulk. Also, I think it might have been a bit tricky having the side seam and a side pocket, and didn't have enough fabric in case I stuffed it up, so decided not to try and include any. I might be game to attempt it in the future if I make these again, but we'll see.


Overall, I'm pretty happy with these. They fit the bill of what I was wanting just right - they're soft, they're breathable, they're casual but not slobby, and they were very easy to make. The pattern being vintage means I'm also making my way through my vintage pledge aim for the year.

Thursday 26 November 2015

Bali Batik Picnic Dress


I love summer dresses. They're light and fun, and the warm weather is a great excuse to use lots of colour and print (although I'll happily use lots of colour and print in winter, too). Summer dresses are also often quite simple in their styling and quick to make, which is great when you want something new for a heatwave. Sydney's already had a number of very hot days and it's still technically spring, so I can see a few more hot weather dresses in my near future.


My brother and sister-in-law bought me a couple of pieces of batik fabric when they went to
Indonesia earlier this year. This is the first one I've used. I decided that given it's a fabric from a hot weather country, it had to be made into a hot weather dress. I love the rich blue colour, but I'm not really sure what the print is meant to be. There's floral vines and then three other prints that look like a beer stein, a quiver of arrows, and some sort of griffin, but I could be wrong.

The fabric has finished selvedges on all four edges, so I made as much use of that as I could. Those selvedges have been used for the hem, the top of the bodice, and even the zipper and centre back seam. I even used the finished side edge that makes the centre back seam/zipper for the back join of the straps. It's not noticeable unless you look closely - you can just see it in the left of this photo - but I thought it would be a nice touch.


The pattern is Queen of Darts' Picnic Dress, which is a fairly simple, very timeless cut. It looks like it could be from any decade since the 1940s. It's a seven piece princess seamed bodice - front piece, and two each of side front, side back, and back - and then straps and dirndl-style skirt. The instructions are pretty minimal so it's not for a complete beginner, but as long as you know fairly basic sewing techniques it's easy to do.

The pattern is free, but it's only in the one size. Lucky for me, I'm pretty much the same size as Alice. I am a bit taller, though, so I added 1.5cm to the length of the bodice so it sits at my waist. I also made my straps a bit wider partly to show more of the print, partly because the spaghetti-thin straps are fiddly to do. Because the fabric had finished selvedges I simply used the full length of the fabric for the skirt, so no finishing was needed for the hem or centre back seam.


The one thing I didn't think of while sewing the bodice was the seams. Because I was using the selvedge, I obviously don't have any facings, so I thought the seam allowances might show. Rather than unpick and redo the bodice, I did flat felled seams. I trimmed half off one side of the seam allowance, folded the other half over it, and stitched it down, with the stitching line on the side towards the back of the dress. This keeps everything neat and out of the way. If you look closely in this photo you might be able to see the royal blue lines. In the end, it's an accident that I can pretend is a feature.


Although it's been washed a few times the fabric is still slightly starchy, but it should soften up quickly. The skirt also liked catching the wind when I was taking these photos. Because it's a batik and not produced using more industrial techniques it did have a fair bit of loose dye the first time I washed the fabric, but it's been soaked two more times and barely leaves any dye, which is great.


 I really like the shape of this dress. It's simple but not boring, feminine but not fussy. It would be nice if it had pockets, but given that the skirt is only a single piece I didn't have any side seams in which to add them. I thought briefly about adding patch pockets to the front, but decided not to because I want to keep it as clean as possible. If I reuse this pattern I will probably add side pockets, but I'm happy with this one without them.


 It was once again stupidly hot while taking these pictures, almost mid-30s with a hot wind at 9:30am, but the dress is wonderfully cool. The fabric is pretty thin, almost a lawn weight, so it's very comfortable and light to wear. It kept me nice of comfortable for the whole rest of the day in the heat.


Wednesday 18 November 2015

Cooling Breezy Rayon Top

Ah, summer. Here you are. It's stupidly hot in Sydney right now, so luckily my latest make is a very soft and lightweight top.

The fabric is the first of the ones I've been planning to use this summer, one of six fabrics on my upcoming projects page. This rayon jersey was bought at Spotlight on clearance. It's beautifully soft and I love the print, but it's fairly thin and very stretchy and really doesn't like holding any shape at all.


The pattern is Simplicity 2261 which is no longer in print, but is a collection of three different jersey tops, one pair of pants, and one skirt. I've made top A, but with a little modification. The pattern is meant to be double layered, but the piece of fabric I had wasn't large enough for a top layer. And honestly, I think it would have been too heavy, anyway. I was wanting a very airy top for hot days, and extra layers of fabric would defeat the purpose. The pattern also suggests adding a trim or two on the yoke pieces, so I had a look through the bits of ribbon and rickrack I own to find anything that matched. But the print is already enough and doesn't need any additions, so I left that off.


Because the jersey is so stretchy, I had a few problems with the yoke. The yoke is two layers, but only the facing has interfacing applied. But this jersey is so soft and stretchy that it had pulled a bit out of shape just by attaching the front and back pieces to the yoke. The back was ok to stitch on, but I had to baste the front yoke and gather it slightly so that it would attach properly to the facing. And even with that, it doesn't quite sit flat, although it's not too noticeable.


The good thing is, though, the top is wonderfully cool in the heat. Because it's basically a trapeze gathered in the centre, it's loose and allows a lot of airflow. It also picks up any bit of breeze which is great when it's 38 degrees (100 Fahrenheit) with a very bright sun.

 There's probably more I could say about this top, but it's too hot right now to think of anything else. All that really matters is it's very hot here, but this top keeps me thankfully (relatively) cool. Which is very welcome.


Friday 6 November 2015

Cropped Nani Iro Top


There are a few fabric brands that are lovely but pricier, which daunt me a little from buying them. I buy some of my fabric and quite a few patterns and zippers from op shops, so expensive fabric is a bit scary. Nani Iro is one of those brands that have daunted me, because the fabrics are so nice and I don't want to screw it up. But when Tessuti Fabrics got some new Nani Iro in earlier in the year I just could resist buying a little bit. The fabric is the blue Sazanami Pocho, Tessuti still have the pink.


I didn't have much money to spend, so I only bought half a metre. I'm quite little, and I didn't want to make anything complicated anyway, just a simple top. Originally I'd been thinking of doing something sleeveless, a shell or tank top. But I wasn't really certain what I wanted to do, and it was winter, anyway, not really the time of year to be making light and airy tops. So I put my little piece of Nani Iro away in my stash for a later date when I had a better idea of what to do, and when the weather was right to wear it.


I was still thinking every so often about exactly what to make, taking in influences from what I saw on other blogs, Instagram, and even in shop catalogues. I decided that the top would be unstructured, and that to complement that I'd make it just slightly cropped. I'd also seen a bunch of tops with pompom trims on them and really liked the idea, so went to see if I could find a trim that would match some of the spots. Spotlight had this red pompom trim that seemed a perfect match.


I thought the pompom trim would look better on sleeves than on a sleeveless tank. I still didn't want to have multiple pieces to the pattern, so I simply started cutting two matching rectangles but added an extra inch of width at the top for all-in-one sleeves. Easy and lazy. For the neckline I just did trial and error, cutting the curves of both front and back pieces down. The back was right first time, but I lowered the front neckline slightly from where I first cut it. I did think about making it a deep scoop, but in the end decided I liked how it sat just below my collar bones.

After that, it was very fast to put together. Given it's just two pieces there wasn't much sewing at all. I used red threat to match both the red spots and the pompom trim. Normally I avoid visible stitching, but I thought it would complement this fabric and this top well.


This was an extremely fast make - about an hour, compared to the huge time and effort on my last make, the DuBarry dress. The attention to detail required for a long make is really rewarding when you get it done, but short and fast makes like this top are great because you have something to show off so soon after you started.


Tuesday 27 October 2015

Averting Disaster in a Denim DuBarry

Getting this made was a bit of a saga. It's meant to be a transseasonal piece, but it's only now been finished, at the end of October. The pattern is early 1940s, but the denim and shortened hem takes it via the 1970s.

The pattern is one I bought at a vintage fair about four years ago, but have been a bit scared to use. It's DuBarry 5265, and it's extremely elegant. DuBarry was a pattern brand produced by Simplicity in the 1930s-40s, and they're hard to find and often pricey. This is the only one I own, and it's from 1942, so I'd been saving it until I found something I really wanted to sew it with. And so obviously denim was the perfect match for a classy 1940s pattern. I kind of think that the designers of the DuBarry patterns might be a bit horrified at making a dress out of - gasp! - denim, but I'm really happy with the choice of fabric.


I've been scared of working with denim for years. I've used almost every other fabric happily, even tricky fabrics like lace, lycra, velvet, and sequins with no problems. But denim? I've taken up jeans once or twice and it was a horrible experience. But I decided I wanted to conquer that fear and be able to use denim myself. Seeing lots of other sewing bloggers who've made their own jeans, denim jackets, etc, I wanted to join in the fun.

This lightweight denim is from Spotlight. I chose it because of the criss-crossed diamond/grid pattern and its nice dark wash. I thought that I'd make the diamonds match up nicely along the princess seams of the coat dress, and it would look fantatic. Well, after much frustration folding the fabric this way and that, I discovered that the grid lines are completely uneven! It was absolutely impossible to fold the fabric in a way that would let me get even the same pieces to have matching lines, let alone matching each piece's seams to its neighbouring piece. Coupled with the fabric being cut on a slight diagonal and undersized by the sales assistant, fitting the pattern pieces on the fabric was going to be difficult.


And then I compounded it all by for some stupid reason cutting out four side back pieces, and missing the centre front pieces. I didn't have enough fabric left over for the centre front pieces, and the pattern piece wouldn't fit properly on the extra side back pieces, so I was a bit stuck. And I still hadn't cut out the front facings, either, or the sleeves.  I didn't want to trek back to Spotlight just to get another foot of the fabric, so I looked at the extra side back pieces as well as the scrappy bits of fabric I had left to see what I could do. I had one rectangular piece about 60cm long left, which was good for the sleeves. Because that piece was smaller, those are probably the only part of the dress where the gridlines of the two sides actually match.


The centre front and front facings were going to be harder. I couldn't fit either pattern piece completely on the side back pieces, and I didn't have any offcuts large enough for them, either. In the end I realised I simply didn't have enough of the denim to cut all four pieces out completely. The facings were going to have to be at least partly in another fabric. Because the top of the facings is visible as part of the collar, I wanted them to be denim, but the rest of it could be in another fabric. So I focused first on the centre front pieces. They were going to have to be cut as two halves, joined at the waistline. So I marked the waistline on my pattern piece, and then cut the top halves out on my extra side back pieces, and the bottom halves on some of the leftover denim. I was then able to use the last bits of the extra side back pieces to cut out just enough of the front facings for the collar and top button - genuinely the exact minimum fabric I needed. It pays to be economical with pattern placement and fabric use! For the rest of the facings I was planning to be sensible and use something neutral, but going through my box of leftover fabric I found this one near the top and just couldn't resist. But pink and blue flowers on a bright yellow background is just so much better than navy or black cotton.


I have to confess that when I cut out this dress I didn't actually own jeans needles. I had some new size 14 and 16 needles, and the denim is lightweight, so I thought I'd give it a shot with them.
No. Bad idea.
It worked okay to join the two centre front pieces, but when I tried to do a seam my thread broke after about 10cm. The pattern does say that the dress is meant to hang basted (or, in my case, pinned) together for a minimum of 24 hours so that the hem can settle. It ended up being closer to 24 days by the time I'd bought jeans needles, made mum's dress, and was able to get back to this. But once I had the jeans needles, it sewed up like a dream. I'm sure those of you who've sewn with denim before are rolling your eyes at my bad sewing laziness, but at least I've now been converted to jeans needles.


I made a couple of changes to the pattern. As with all early 1940s patterns, the hem for this coat dress was originally below the knees. It's not really a length I like, not that I had enough fabric for it, anyway. So I shortened the hem to finish just above the knee, which makes it more wearable and fresh. I also decided on elbow length sleeves, rather than the short or long sleeve options of the pattern. The sleeves are also slightly narrowed in, because the original sleeves are gathered at the cuff. The sleeves also have fairly full sleeve heads which I was worried would be too puffy, but they're actually not all that big. But they do allow full movement in all directions with no pulling, which not all dress patterns do.


All the seams are once again French seams. Given this is a coat dress (and one that also works well as a coat), I wanted the seams to have a more polished finish, and I think the French seams do that. Of course it added a lot to the time it took to make the dress, and a bit of thought to the order I needed to do the seams in, but the final look is just right. The facings and hem are hand stitched, which took hours. In total there's got to be more than 20 hourse of sewing - both machine and hand - in this dress.


For the buttons, I decided that I wanted something that suited the denim more than that 1940s. This dress is basically vintage-modern, rather than vintage-costume, so I didn't think about matching the era. I briefly thought about metal buttons like jeans and denim jackets have, but decided they'd stand out too much, rather than blending in to the dress. So my next thought was dark wood. I didn't own any, so next time I was in the city I had a look in Lincraft at their button selection. They had some wood buttons, but they were all either too small, or too big, or too light. Then I spotted these coconut shell ones. I've actually used the back, rather than the lighter front, but they were just the colour and feel I wanted.


It's a coat dress, but making it with denim it really does work as both a coat and a dress. And yes, I am wearing it here with jeans so it is double denim - but at least they're maroon leopard print skinny jeans.


The wildly varying light levels in the photos are because of the weather. After storms yesterday and morning showers, I managed to catch a break in the rain, so the sun was sometimes out, sometimes behind the clouds, pretty much changing between every shot.

This took a long time and a lot of work to make, but final product does, I think, make up for the time and stress. And although it's a coat dress, it works as both a coat and a dress, so two items for the price of one! But definitely the effort of five.